 Save
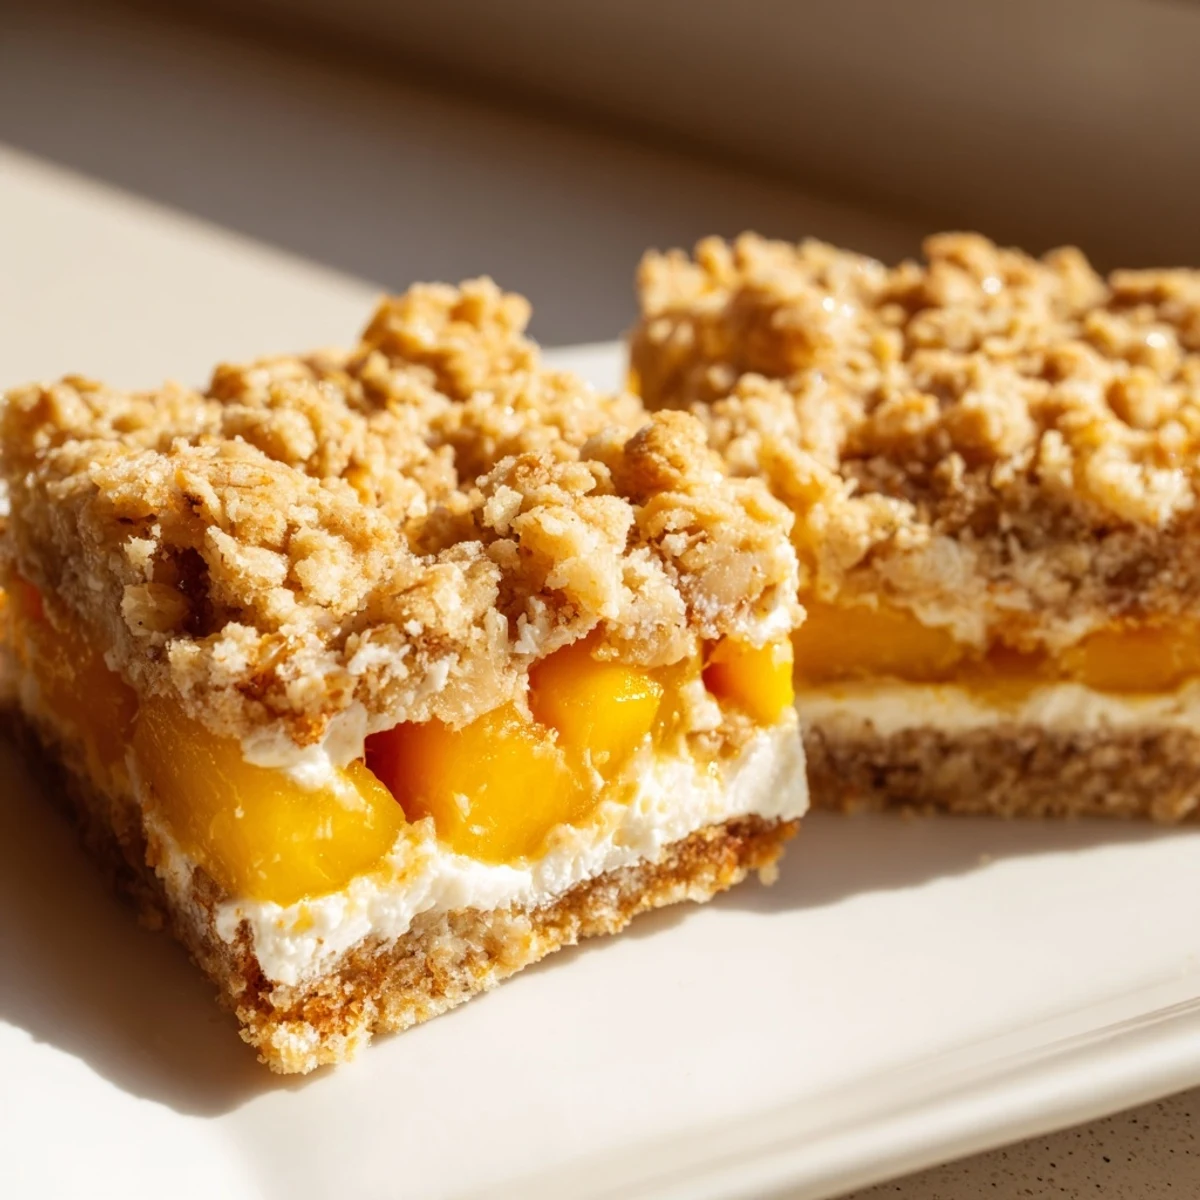
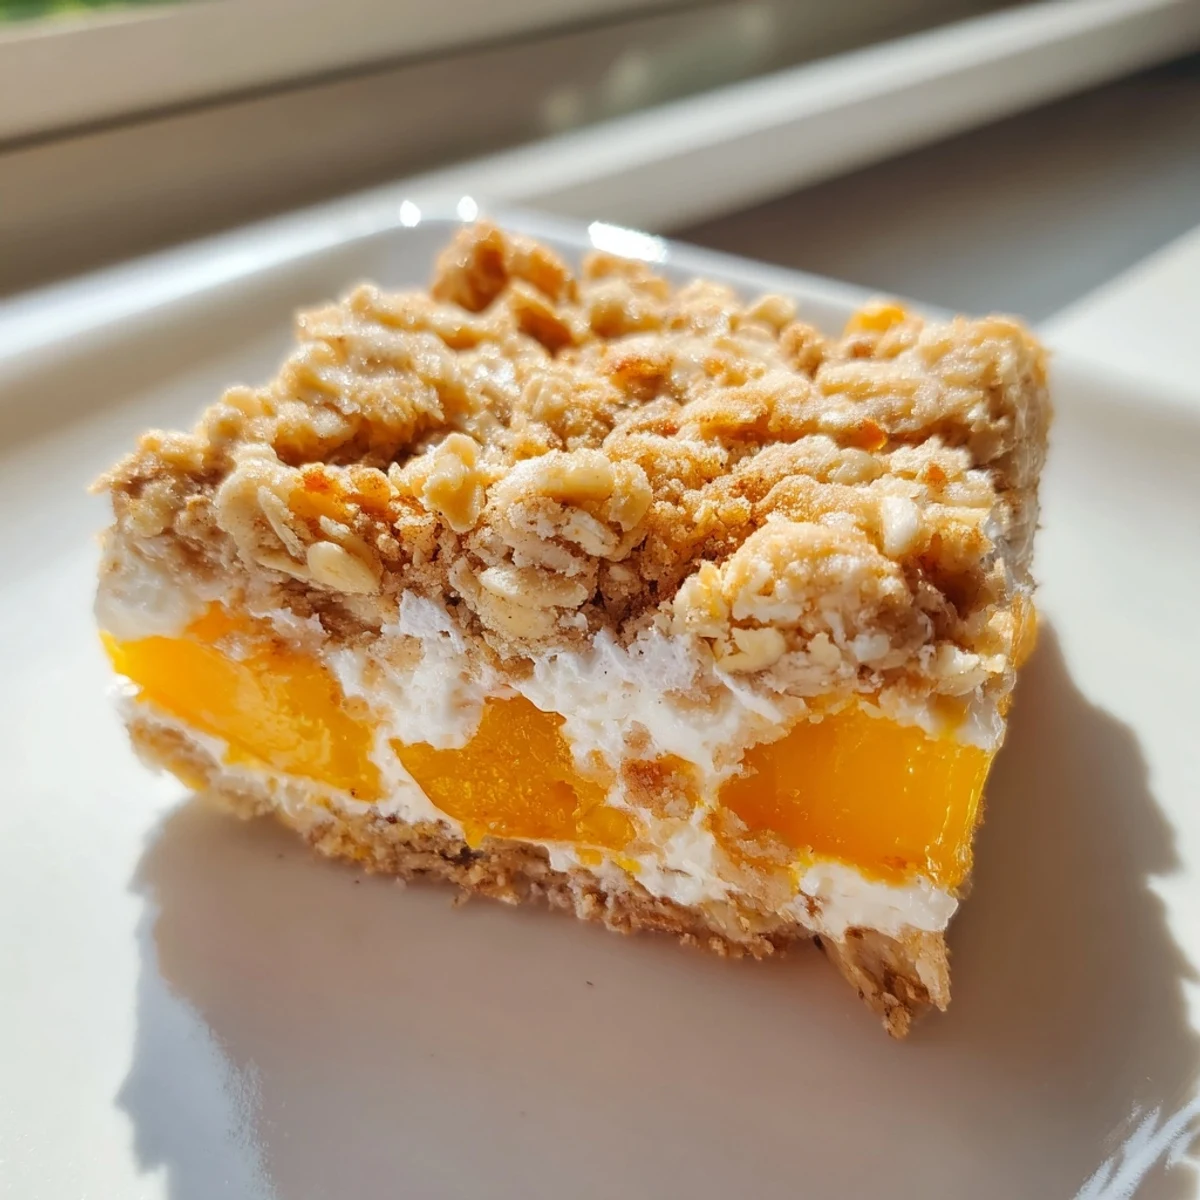
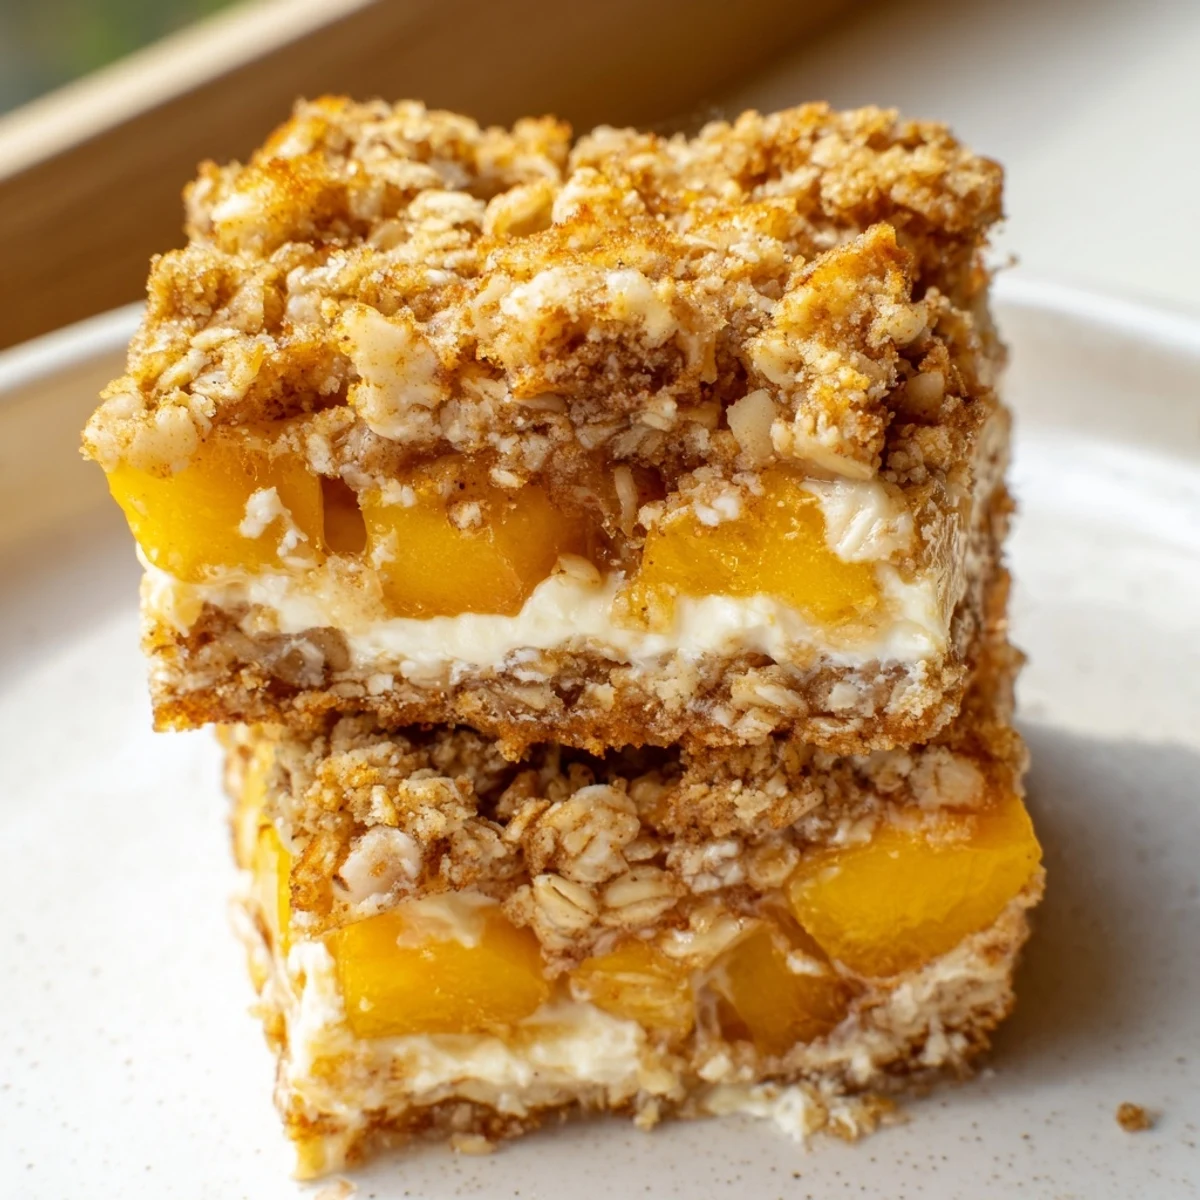
Save These bars feature three delicious layers starting with a buttery oat crumble base, followed by a smooth cream cheese filling, and topped with juicy sweet peaches. The crumble topping adds delightful texture while the peach layer becomes perfectly jammy during baking.
Best served chilled after at least two hours of refrigeration, these bars hold their shape beautifully for picnics and potlucks. Swap in nectarines or mixed berries when peaches aren't in season, or go gluten-free with certified oats and flour blend.
My grandmother had this sprawling peach tree in her backyard that produced fruit so abundant we'd give bags away to anyone who walked by. One sticky July afternoon, instead of our usual cobbler, she decided to layer peaches with sweet cream and buttery oats in a baking dish. The whole house filled with this incredible cinnamon warmth while we sat on her back porch shelling butterbeans. Those bars disappeared faster than anything she ever made, and now every summer baking session feels like an invitation back to that moment.
I brought these to a neighborhood block party last summer, still slightly warm from the oven, and watched them vanish within fifteen minutes. My neighbor Sarah actually texted me the next morning begging for the recipe, saying her husband kept talking about them in his sleep. Something about that combination of buttery oats, sweet cream, and fresh peaches just makes people feel taken care of.
Ingredients
- 2 cups all-purpose flour: Forms the sturdy backbone that holds all those lovely layers together without getting soggy
- 1 1/2 cups old-fashioned rolled oats: Use these instead of quick oats for that satisfying chewy texture and nutty flavor
- 1 cup granulated sugar: Sweetens the crumble just enough to let the peaches shine without overpowering them
- 1/2 tsp salt: A tiny pinch that makes all the flavors pop and keeps the bars from tasting flat
- 1/2 tsp ground cinnamon: Adds warmth that bridges the gap between the tangy cream and sweet peaches
- 1 cup unsalted butter, cold and cubed: Keep this ice cold to create those irresistible crispy, buttery pockets in the crumble
- 8 oz cream cheese, softened: Room temperature cream cheese blends into a silky smooth layer that cuts through the sweetness
- 1/3 cup granulated sugar: Just enough to tame the cream cheese tang without making it cloying
- 1 egg: Gives the cream filling structure so it sets up beautifully instead of staying runny
- 1 tsp vanilla extract: Pure vanilla adds a floral sweetness that rounds out all the layers
- 3 cups fresh peaches, peeled and diced: Look for peaches that yield slightly to pressure but still hold their shape when baked
- 1 tbsp cornstarch: Thickens those peach juices so you get distinct layers instead of a soggy mess
- 2 tbsp lemon juice: Brightens the peaches and keeps their gorgeous golden color from turning brown
- 1 tbsp granulated sugar: Coaxes out the peach juices and balances the lemon's acidity
Instructions
- Get your oven and pan ready:
- Preheat that oven to 350°F and line a 9x13 inch baking pan with parchment paper, letting some hang over the sides for easy lifting later.
- Make the crumble mixture:
- Whisk together your flour, oats, sugar, salt, and cinnamon in a big bowl, then work in that cold cubed butter with your fingers until it looks like sandy crumbs with some pea-sized pieces remaining.
- Press the base:
- Take about two-thirds of your crumble mixture and press it firmly and evenly into the bottom of your prepared pan, really packing it down so it holds together.
- Whip up the cream filling:
- Beat your softened cream cheese and sugar until completely smooth, then add the egg and vanilla and keep beating until glossy and combined.
- Spread and layer:
- Dollop the cream mixture over your crust and spread it gently to the edges, then toss those peaches with cornstarch, lemon juice, and sugar before arranging them on top.
- Add the topping:
- Sprinkle your remaining crumble mixture over everything, letting some peach peek through for that pretty rustic look.
- Bake to golden perfection:
- Slide the pan into the oven for 38 to 42 minutes until the top is golden brown and the center barely jiggles when you gently shake the pan.
- The hardest part, waiting:
- Let these cool completely at room temperature, then refrigerate for at least 2 hours before slicing into clean squares that hold their shape beautifully.
 Save
Save Last summer I made these for my daughter's birthday instead of a traditional cake, and she said it was the best decision ever. We ate them on the back porch while the fireflies started blinking, and somehow that simple moment felt more special than any fancy bakery cake could have been.
Making These Ahead
These bars actually improve with a day in the fridge, as the flavors meld together and the crumble stays perfectly crisp while the cream sets up firm. I often bake them the day before a party, store the whole uncut pan in the refrigerator, and slice them right before serving for the cleanest cuts.
Peach Selection Secrets
The trick is finding peaches that give slightly when you press them but still feel firm enough to hold their shape through baking. I've learned the hard way that super soft peaches turn into delicious soup, while underripe ones never develop that luscious jammy texture we're after.
Serving Ideas
These are fantastic on their own but become absolutely extraordinary with a scoop of vanilla ice cream melting into all those warm layers. They're also sturdy enough to pack in a picnic basket or bring to a potluck without any worry about them falling apart during transport.
- A dusting of powdered sugar right before serving makes them look extra special
- Try swapping half the peaches for fresh blueberries when both are at their peak
- These freeze beautifully for up to a month if you wrap individual bars tightly
 Save
Save There's something about pulling that golden pan from the oven, knowing these bars are going to make someone's day a little sweeter. That's the real magic of baking, isn't it?
Recipe FAQs
- → Can I use frozen peaches?
-
Yes, frozen peaches work well when thawed and thoroughly drained to prevent excess moisture. Pat them dry with paper towels before tossing with cornstarch.
- → How long do these bars need to chill?
-
Refrigerate for at least 2 hours after cooling completely. This allows the layers to set properly so bars slice cleanly and hold their shape when served.
- → Can I make these gluten-free?
-
Absolutely. Use certified gluten-free oats and a 1:1 gluten-free flour blend in place of regular flour. The texture and taste remain just as delicious.
- → How should I store leftovers?
-
Keep refrigerated in an airtight container for up to 5 days. The bars actually improve after chilling overnight as flavors meld together. Serve cold or at room temperature.
- → What other fruits work in this?
-
Nectarines are the easiest substitute. Mixed berries, sliced plums, or even cherries work beautifully. Adjust cornstarch slightly if using juicier fruits to maintain proper consistency.