 Save
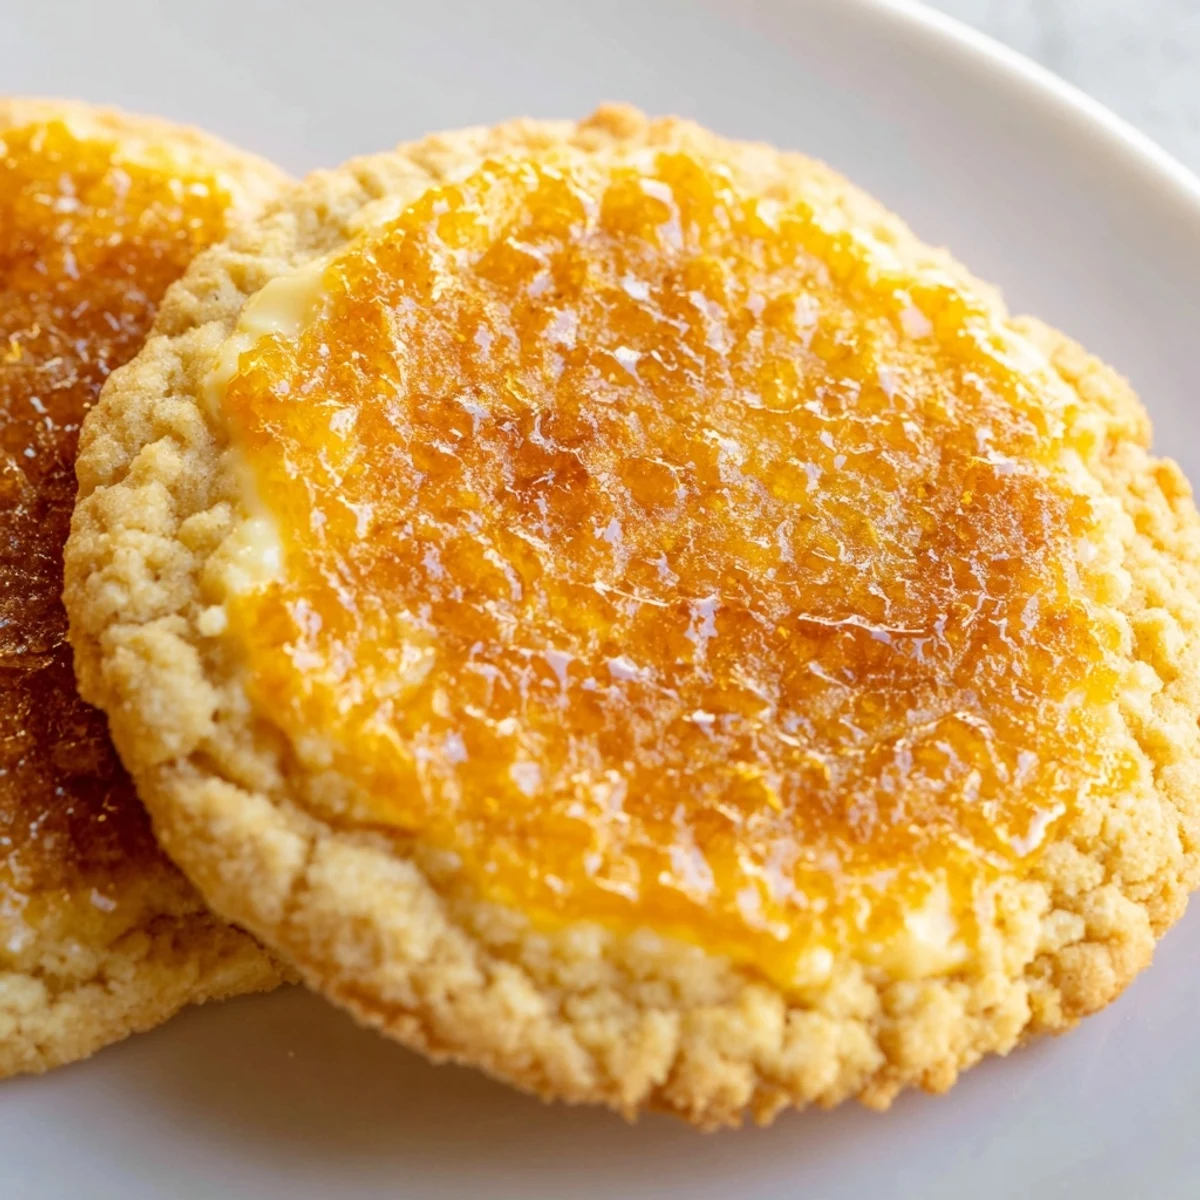
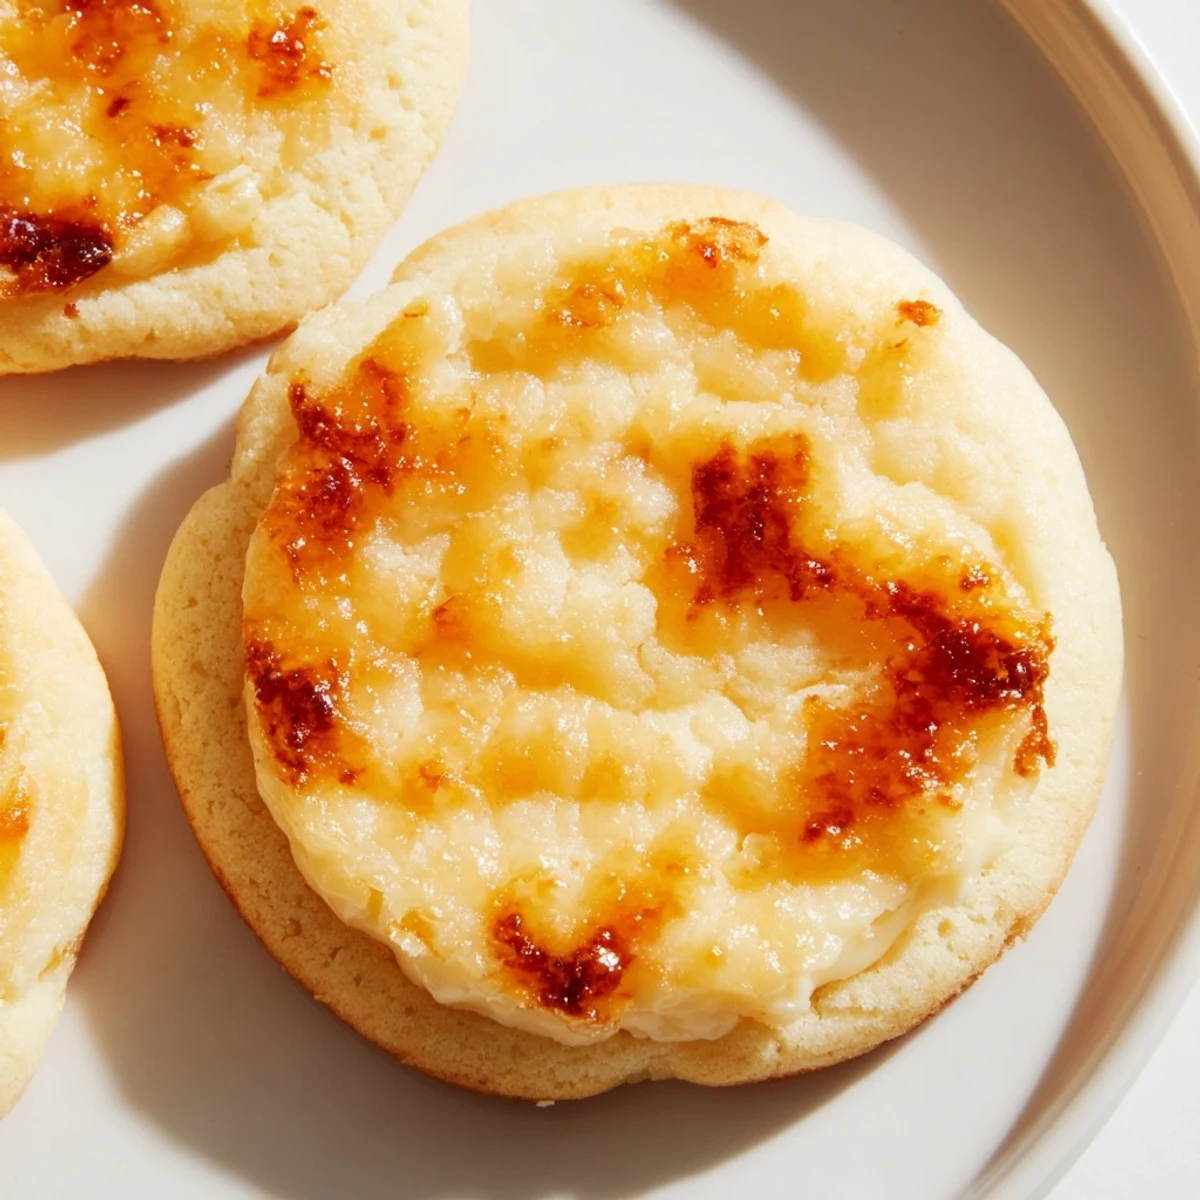
Save These soft baked cookies capture the essence of classic French crème brûlée in a delightful handheld form. Each cookie features a tender vanilla dough wrapped around a smooth cream cheese filling, topped with a layer of caramelized sugar that creates that signature crackly crunch. The combination of textures—soft chewy cookie, creamy center, and crisp brûlée topping—makes these an impressive dessert for gatherings or a special treat at home.
The smell of burnt sugar hit me first. My sister had just discovered kitchen torches and was caramelizing everything in sight. When she suggested we try turning crème brûlée into a cookie, I looked at her like she'd lost her mind, but that afternoon in the kitchen changed everything about how I think about dessert mashups.
I brought these to a book club meeting last fall, and everyone went silent after that first distinctive crack of the caramelized topping. My friend Sarah actually asked if I'd spent hours at a French pastry school learning techniques. The truth is much simpler and much more fun.
Ingredients
- All-purpose flour: The foundation that holds everything together. I've learned that weighing your flour instead of scooping directly from the bag makes a huge difference in texture.
- Baking soda: Just enough lift to give these cookies their signature soft center while keeping edges perfectly set.
- Salt: Don't skip this. It balances all that sweetness and makes the vanilla flavor really sing.
- Unsalted butter: Softened to room temperature. This is crucial for achieving that light and fluffy dough that bakes into pure heaven.
- Granulated sugar: Creates the perfect cookie base and that beautiful golden edge we're all after.
- Egg yolks: Using only yolks adds incredible richness and gives the cookies that tender, almost cake-like texture.
- Pure vanilla extract: I'm generous here. Vanilla is the backbone of this whole flavor profile.
- Sour cream: The secret ingredient that keeps these cookies soft for days. Trust me on this one.
- Cream cheese: Completely softened so it blends seamlessly into the filling. No lumps allowed.
- Vanilla bean paste: Those gorgeous little vanilla specks throughout the filling make these cookies look professionally made.
- Extra sugar for topping: This is what creates the magic. A thin, even layer torches up into that perfect glass-like caramelized crust.
Instructions
- Getting everything ready:
- Preheat your oven to 350°F and line two baking sheets with parchment paper. Having everything prepped before you start mixing makes the whole process feel so much more manageable.
- Mixing the dry ingredients:
- Whisk together flour, baking soda, and salt in a medium bowl. This simple step ensures everything is evenly distributed before it hits the wet ingredients.
- Creaming the butter and sugar:
- Beat softened butter with sugar until it's light and fluffy. I take my time here. The air you incorporate now translates to lighter cookies later. Mix in egg yolks, vanilla extract, and sour cream until everything is fully combined.
- Bringing the dough together:
- Gradually add the dry ingredients to the wet mixture. Stop as soon as a soft dough forms. Overmixing at this stage will make your cookies tough, and nobody wants that.
- Making the filling:
- Combine cream cheese, sugar, and vanilla bean paste in a small bowl. Beat until smooth and creamy. This filling is what takes these cookies from good to absolutely unforgettable.
- Assembling the cookies:
- Scoop about 2 tablespoons of dough and flatten into a disc. Place 1 teaspoon of filling in the center, then fold the dough around it and pinch to seal. Place seam side down on your prepared sheet, leaving 2 inches between cookies.
- Baking to perfection:
- Bake for 11 to 13 minutes. You want edges set but centers still soft. They'll continue cooking on the pan, so don't worry if they look slightly underdone.
- The torch moment:
- Let cookies cool completely. Sprinkle a thin layer of sugar on top and torch until golden and crisp. This is where the magic happens.
 Save
Save My nephew walked into the kitchen while I was torching a batch and his eyes got huge. He said it looked like science class but smelled like the best dessert of his life. Now every time he visits, he asks if we're doing the fire cookies.
Making These Ahead
I've learned that the cookie dough balls freeze beautifully. Scoop and fill them, then freeze on a baking sheet before transferring to a bag. Fresh baked cookies in 15 minutes whenever the craving hits.
Getting That Perfect Brûlée
Practice your torching technique on a spare cookie first. I learned the hard way that too much sugar creates a thick, tooth breaking layer instead of that delicate caramelized shell we're after.
Serving Suggestions
These deserve to be the star of the show. I love serving them plain with coffee or tea, letting that vanilla cream filling really shine through. The contrast of temperatures is pure magic.
- Serve within an hour of torching for the ultimate crackle experience
- Store unfilled dough in the fridge for up to 3 days before baking
- Room temperature ingredients are not optional here for the best results
 Save
Save There's something deeply satisfying about hearing that first crack of the caramelized sugar. These cookies have become my go to for bringing a little extra joy to ordinary afternoons.
Recipe FAQs
- → What makes these cookies different from regular cookies?
-
These cookies feature a creamy vanilla center and a caramelized sugar topping that replicates the classic crème brûlée experience. The combination of soft dough, smooth filling, and crisp brûlée layer creates multiple textures in every bite.
- → Do I need a kitchen torch to make these?
-
A kitchen torch is ideal for achieving the perfect caramelized sugar topping, but you can also use your oven's broiler. Place cookies under the broiler for 1-2 minutes, watching closely to prevent burning.
- → How should I store these cookies?
-
Store in an airtight container at room temperature for up to 3 days. For best texture, consume within 24 hours of torching the sugar topping as it may soften over time.
- → Can I make the dough ahead of time?
-
Yes, you can prepare the dough and filling separately and refrigerate for up to 24 hours before assembling and baking. Let dough come to room temperature for easier handling.
- → What's the best way to prevent the filling from leaking?
-
Ensure the dough is sealed completely around the filling by pinching the edges tightly. Place cookies seam side down on the baking sheet and avoid overfilling with cream cheese mixture.
- → Can I use vanilla extract instead of vanilla bean paste?
-
Yes, vanilla extract works perfectly as a substitute. Use the same amount called for in the recipe. Vanilla bean paste provides subtle flecks and a slightly more intense flavor, but extract yields excellent results.