 Save
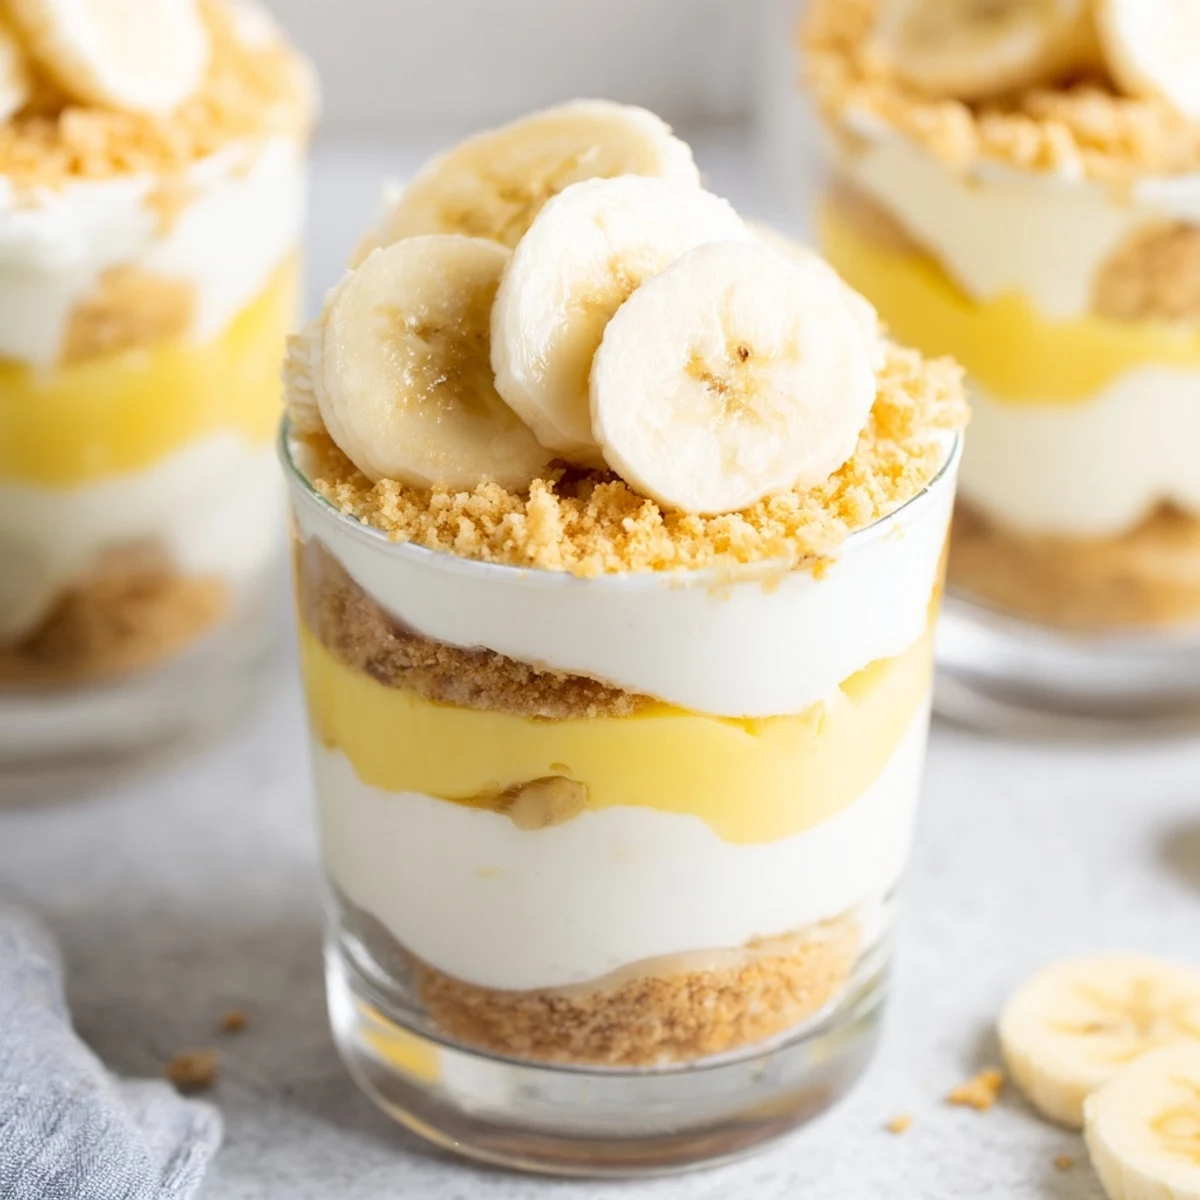
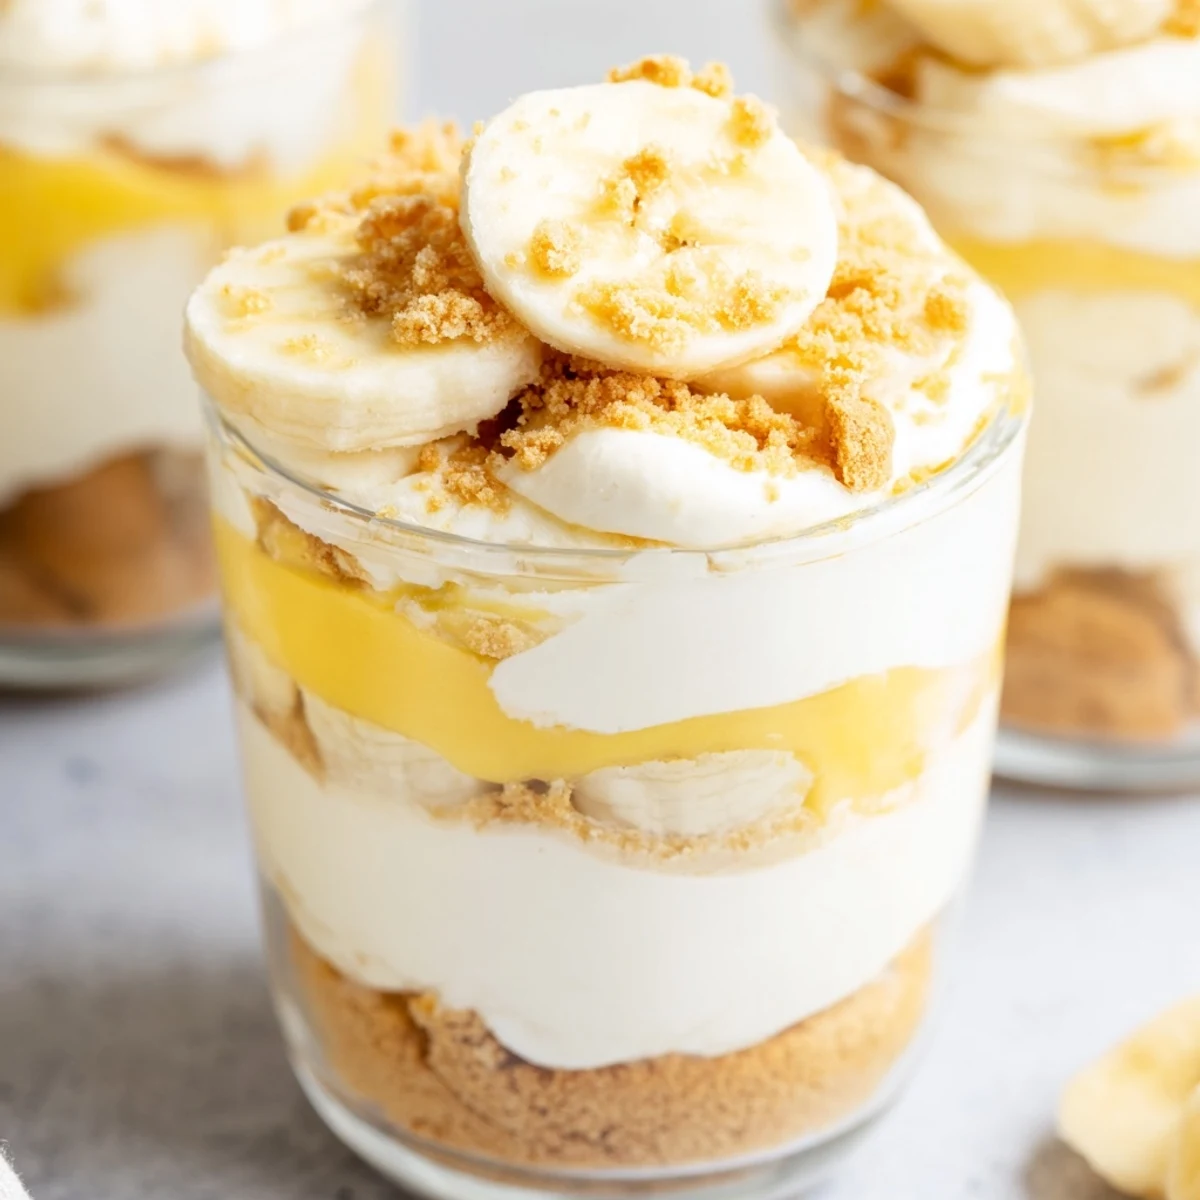
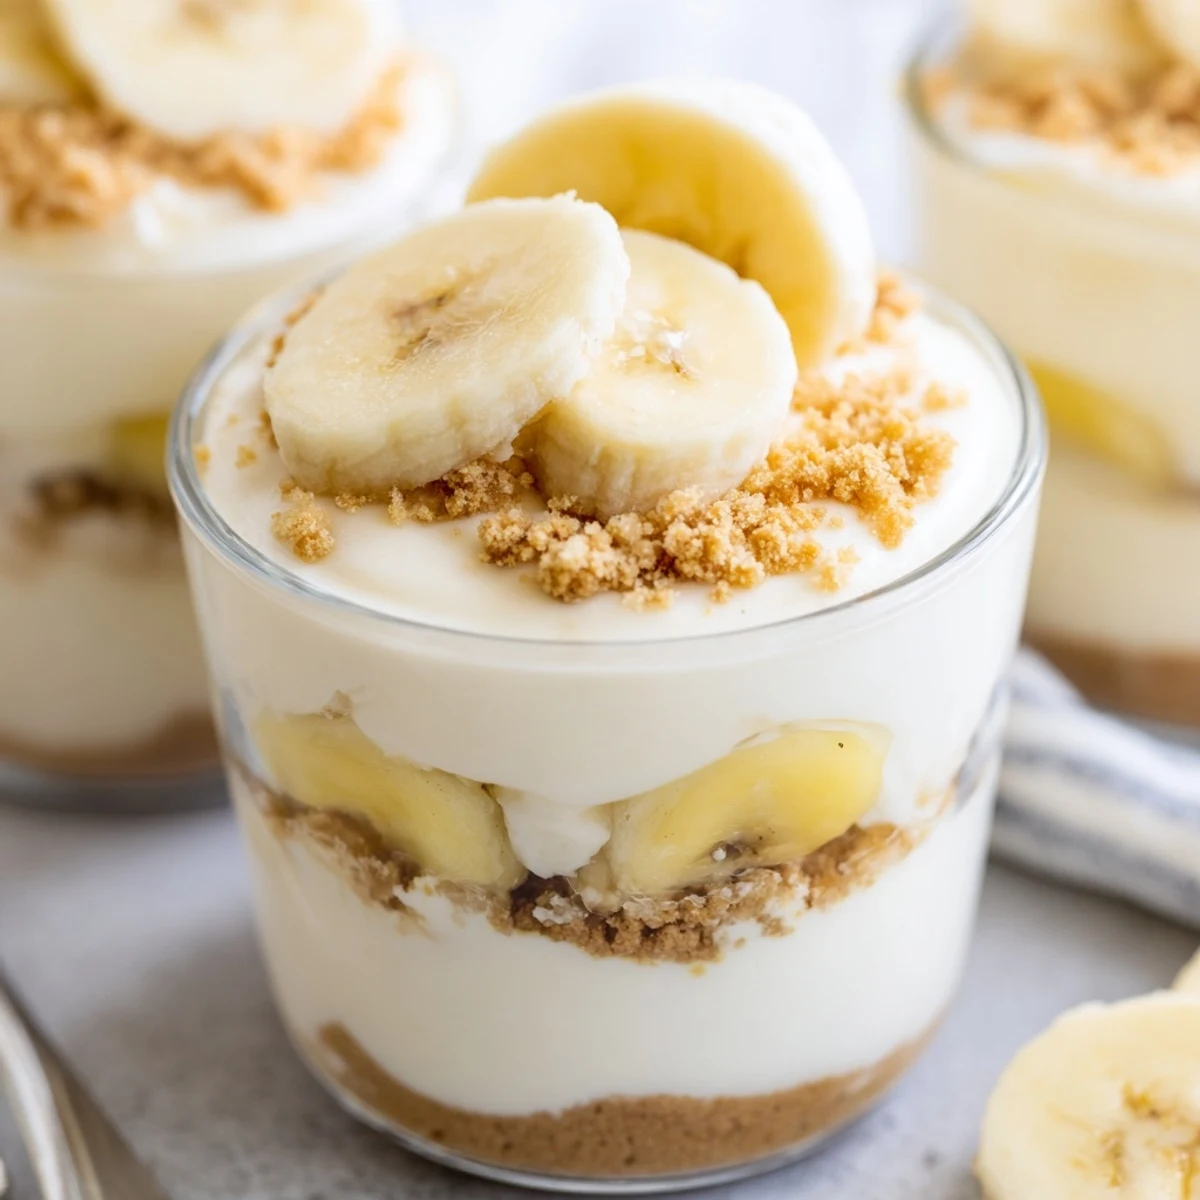
Save These individual cups feature indulgent layers of velvety cheesecake filling and classic banana pudding, all resting on a buttery vanilla wafer crust. Each cup delivers creamy textures and sweet banana flavor in every spoonful, topped with fresh fruit and crunchy crumbs for satisfying contrast.
Perfect for gatherings or special treats, these portable desserts come together quickly without any baking required. The combination of smooth cream cheese mixture, instant banana pudding, and whipped cream creates an irresistibly rich experience.
The weather had turned unseasonably warm for April, and my kitchen felt like the last place I wanted to stand over a hot stove. I had invited friends over for what was supposed to be an elaborate dinner, but by mid-afternoon, I realized I'd completely forgotten about dessert. These little cups became my salvation—thrown together in a flurry of last-minute energy, they disappeared faster than anything I've ever made from scratch.
My grandmother kept vanilla wafers in a perpetual blue tin on top of her refrigerator—not for cookies, but specifically for banana pudding. I'd climb onto the counter and steal them, crunching away until caught. Years later, standing in my own kitchen making these cups, that familiar vanilla scent transported me back. Now I keep extra wafers on hand, partly for baking and partly for the stolen nibble that makes everything taste like home.
Ingredients
- 1 cup vanilla wafer cookies, crushed: These classic cookies create the perfect buttery crunch that holds up beautifully against the creamy layers
- 2 tbsp unsalted butter, melted: Just enough to bind the crumbs together without making them soggy
- 8 oz (225 g) cream cheese, softened: Room temperature is non-negotiable here—cold cream cheese creates lumps that never quite smooth out
- 1/3 cup granulated sugar: Sweetens the cheesecake layer without overpowering the delicate banana flavor
- 1 tsp pure vanilla extract: Use the real stuff—imitation vanilla can taste flat in a no-bake dessert
- 1 cup heavy whipping cream, cold: The secret to achieving that luxuriously light cheesecake texture
- 1 (3.4 oz/96 g) package instant banana pudding mix: Creates an authentic pudding layer without the stovetop effort
- 1 1/4 cups cold whole milk: Cold milk helps the pudding set up properly
- 2 ripe bananas, sliced: Look for bananas with some brown spots—their natural sweetness intensifies the flavor
Instructions
- Build the buttery crust foundation:
- Combine crushed vanilla wafers and melted butter in a small bowl, mixing until every crumb is evenly coated with butter. Spoon about 2 tablespoons into the bottom of each serving cup and press down gently with the back of your spoon—the crust should feel firm but not rock hard.
- Create the dreamy cheesecake base:
- Beat softened cream cheese, sugar, and vanilla extract with a hand mixer until the mixture is completely smooth with no remaining lumps. In a separate bowl, whip the cold heavy cream until stiff peaks form, then gently fold it into the cream cheese mixture until fully incorporated—the filling should become light and airy.
- Whisk up the pudding layer:
- In another bowl, combine the banana pudding mix with cold milk and whisk vigorously for 2 full minutes. The pudding will thicken considerably as you whisk—this is normal and exactly what you want.
- Assemble the beautiful layers:
- Spread half the cheesecake mixture over the crust in each cup, followed by a layer of fresh banana slices. Spoon the thickened pudding over the bananas, then finish with the remaining cheesecake filling on top.
- Add the finishing touches:
- Sprinkle each cup with additional vanilla wafer crumbs and add more banana slices on top. A dollop of whipped cream makes everything feel extra special, though it's completely optional.
- Let the magic happen in the fridge:
- Cover the cups and refrigerate for at least 2 hours—this chilling time allows all the flavors to meld together and the layers to set properly. The hardest part is waiting to dig in.
 Save
Save During a sweltering July heatwave, I made a triple batch for a neighborhood potluck. We sat on back porches and front steps, eating from mason jars while kids ran through sprinklers. Something about those individual portions made everyone feel taken care of, like I'd prepared something just for them rather than for a crowd.
Making Ahead Like a Pro
I've learned through experience that these cups are the ultimate make-ahead dessert. You can assemble everything except the fresh banana topping up to 24 hours in advance. In fact, the texture improves after a night in the fridge—the crust softens just enough to become cake-like, while the cheesecake layer becomes even creamier. When you're ready to serve, simply add fresh banana slices and a final sprinkle of crumbs. This flexibility has saved me more times than I can count.
Presentation Secrets
Clear glass cups or jars showcase those beautiful layers, but don't stress if you only have opaque bowls on hand. I've served these in everything from wine glasses to repurposed jam jars, and somehow they always look impressive. The key is an uneven top layer—spoon the final cheesecake mixture in little dollops rather than smoothing it flat, then let gravity and the final crumb topping create natural texture. Nothing about these cups needs to look perfect to taste absolutely incredible.
Flavor Variations Worth Trying
Once you've mastered the classic version, these cups become a playground for creativity. I've discovered that adding a tablespoon of caramel sauce between layers creates an impressive banana-caramel effect. During fall, mixing crushed graham crackers into the crust adds warmth. Some friends swear by a dusting of cinnamon over the banana slices, while others layer in diced strawberries for a banana split vibe.
- Add a splash of dark rum to the pudding mixture for an adults-only version
- Swap half the vanilla wafers for graham crackers to change up the crust flavor
- Mix a tablespoon of creamy peanut butter into the cheesecake layer for banana pb perfection
 Save
Save There's something profoundly satisfying about a dessert that feels indulgent yet requires zero heat. These cups have become my go-to for everything from Tuesday night sweets to dinner parties—they never fail to make people happy.
Recipe FAQs
- → How long do these cups need to chill?
-
Refrigerate the cups for at least 2 hours before serving to allow layers to set properly and flavors to meld together. For best results, avoid leaving them uncovered for extended periods as the banana slices may oxidize and brown.
- → Can I make these cups in advance?
-
Yes, prepare these up to 24 hours ahead. However, add fresh banana slices and toppings just before serving to maintain optimal appearance and texture. The layers hold up beautifully when properly chilled and covered.
- → What type of milk works best for the pudding layer?
-
Cold whole milk provides the richest texture and flavor for the banana pudding layer. While lower-fat milk options can be used, they may result in a slightly less creamy consistency. Ensure the milk is thoroughly chilled before whisking with the pudding mix.
- → How do I prevent bananas from turning brown?
-
Toss sliced bananas lightly in lemon juice before adding to the cups, or add them just before serving. The acidic coating slows oxidation and helps maintain the bright yellow color of the fruit for several hours.
- → Can I substitute vanilla wafers with another cookie?
-
Graham crackers, digestive biscuits, or Nilla wafers make excellent crust alternatives. Crush approximately 1 cup of cookies to achieve the same texture. Each option brings a slightly different flavor profile that complements the banana and cheesecake layers.
- → What size serving cups work best?
-
Use 6 to 8-ounce individual serving cups, jars, or ramekins to accommodate all three distinct layers. Glass containers allow guests to appreciate the beautiful layered presentation while providing adequate portion sizes.